Showing posts with label kitchen. Show all posts

Monday, June 11, 2012

Home Inspiration... Taylor Tomasi-Hill


I know this looks really basic, and you're thinking... huh?  

But the truth is, I love the freshness of this happy little spot in Taylor Tomasi-Hill's NY kitchen.  Look at the stark, STARK white and how the pinks and reds just jump off of it.  The plants and framed snapshot really help to soften the look.  And the silly red ants, countertop taxi planter, and goofy fly-swatters tell us that this is a fun, whimsical space.  You know, I'm all about the goofy and whimsical...  Oooh, and that darling, classic checkerboard floor?  It reminds me of my elementary school (built in 1835).  

What I want to know is... where in New York did she find that flood of natural light?!  SO beautiful.  And can we just talk for a minute about Taylor's amazing hair?  She famously refuses to cop to her colorist, but dang- if that doesn't give you the "maaaaybe I could pull off red" bug...  I don't know what. 


Taylor's Current Elliott Leopard "Stiletto" denim available here.


Tuesday, May 22, 2012

Home Inspiration...


I'm loving the pretty, graphic paper peeking out from behind the shelves in this photo.
What a neat way to draw the eye back, behind the items.  It seems like it could easily look like 
a jumbled mess of clutter, and too busy... but with all of the white - and the great pops of pink
and blue, I think they pulled it off beautifully.


Here's how I used busy patterns in my own teeny kitchen.  

The pretty, statement-making wallpaper is actually just GIFT WRAP from Paper Sky!
It went on super quickly and easily with a small paint brush, and a little Mod-Podge. 
The best part?  When a project is this simple, and inexpensive- you can swap it out as often as you please.

Perfect medicine for those impulsive moments when my redecorate-disease is acting up and the only cure is to move a couch, paint a wall, or break out the Feng Shui books.


Wednesday, May 16, 2012

More than french fries...

Ready for the easiest, YUMMIEST scramble ever?


I'm talking potatoes infused with truffle oil, havarti cheese, fresh parsley and green onions- 
all mixed up with fresh eggs.  SO tasty.  But labor-intensive, no?  Not at all.  Because I've got a secret.


I picked up a side of truffle fries at Eureka Burger, chopped them into bits, scramble them with eggs, and that's it!  
Breakfast for dinner gone fancy.  In about ten minutes.  You're welcome.  


Sunday, April 15, 2012

Let's make... SPROUTS!

How do you feel about sprouts?


I looooove sprouts.  LOVE them.  Is that weird?  They're teeny, yummy, and fun to eat!  As a kid, I'd snack on them by the handful.  I secretly still do.  And you know what... Jeff and Evy aren't big veggie or salad eaters, but they will inexplicably gobble up sprouts in sandwiches, and quesadillas.  Even Elliott's starting to eat them!  It makes me happy to have them around and know that my picky eaters will get a tasty, nutrient-packed punch.  Different varieties offer different benefits, but many are full of heart healthy compounds, anti-cancer isoflavones and sulforaphane, as well as protein, vitamins A, C, and D, calcium, and folate.  Current studies even suggest that sprouts may prevent and reduce menopausal symptoms.  All this goodness contained in those cute little greenies?  Amazing!

While pregnant with Elliott I craaaaved sprouts.  I harassed the guy at the Mt. Olive stand at Farmers Market every Thursday, and wiped out his sprout stock frequently.  That is, until I started growing my own!  It's so easy, WAY cheaper, and surprisingly fun too!

Here's my home-grown sprout DIY:


I like to start with a mix of Alfalfa, Mustard, Mung, radish and Broccoli seeds.  Radish, mustard and broccoli sprouts seem to offer a mild peppery flavor.  Not spicy, just more flavorful, really.  I can feed this mixture to the baby.  I buy my seeds in the bulk section at SLO Natural Foods Co-op.  Did you know that you need not be a member?  It's a great spot for picking up healthy basics downtown.  


Next, you'll need a jar.  Most health food stores carry sprouting jars.  If you don't see them, ask.  You can grow sprouts in any large, glass jar with cheesecloth and a rubber band.  My jar has a wonderful wire mesh lid and I paid around $6.  Excellent deal and very easy to use.  


Add a spoonful of seeds to your jar.  


Now, rinse them a bit, fill your jar 1/3 with fresh water, and leave your seeds overnight.


You'll notice the seeds beginning to expand and soften underwater.  

Homework:  The following morning, you'll want to completely drain the water from your jar and rinse the seeds several times.  I rinse them twice in the morning, once in the afternoon, and one more time before I go to bed.  The seeds should be kept in a shady (but not dark) spot in the kitchen, and kept moist, but never sit in water after the first night.  After 2-3 days of rinsing, your seeds will be quite sprouted and ready for a few hours of indirect sunlight to soak up healthy chlorophyll and turn a darker shade of green.  

And then... 


VOILA!  Your very own yummy, home-grown sprouts!  I keep mine in a covered Tupperware container in the fridge, with a paper towel to soak up any remaining water.  They'll last nearly a week, unless gobbled up. 


UPDATE:
My mother has asked that I stress the importance of the RINSING in growing sprouts.  To quote her: "If not properly rinsed and stored sprouts can become a bacterial garden in a jar."  Very true, mom.  Good advice.  This project is all about the RINSE, RINSE, RINSE.  And then rinse one more time.  ;)


Friday, March 2, 2012

let's make veggie lasagna!

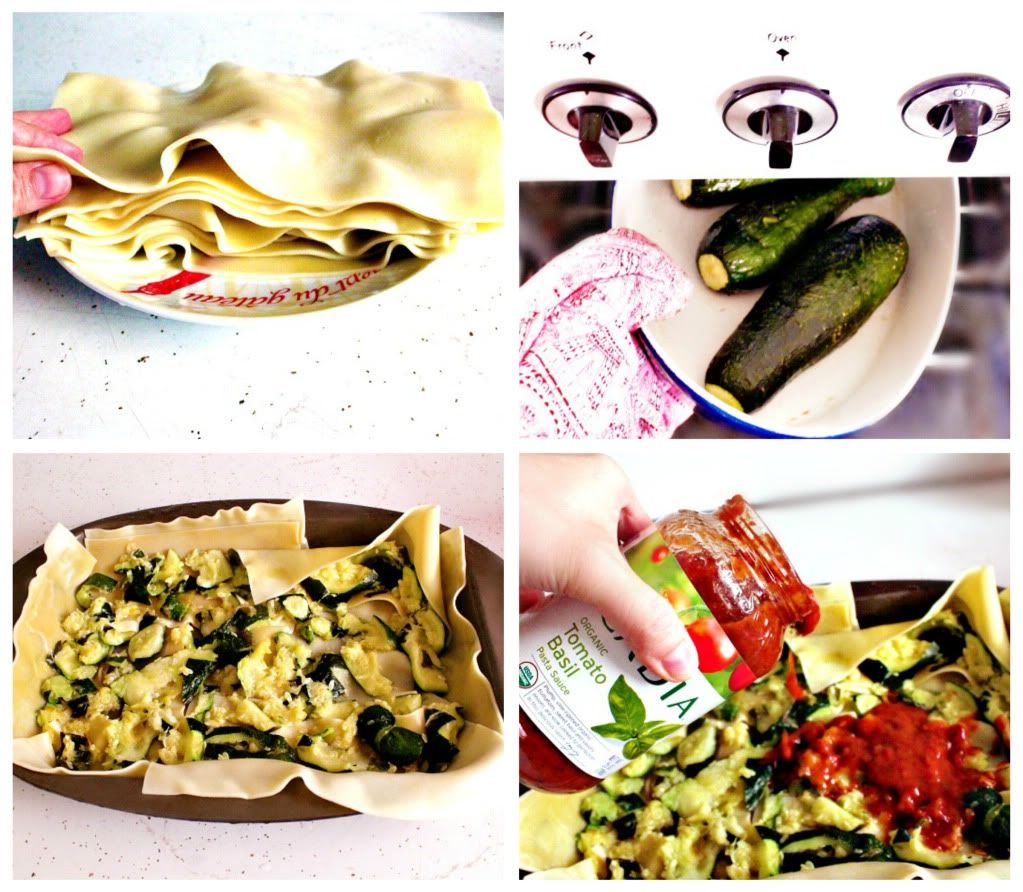
Every once in a while, I crave a super yummy, super cheese-y LASAGNA! Elliott and I made a quick and easy, veggie-packed lasagna this week. We started by boiling one package of pasta...


Lasagna is all about the layering. We do a very thin layer of marinara, a solid layer of noodles, 
and then roasted zucchini (mashed & drained)...


Now more marinara...
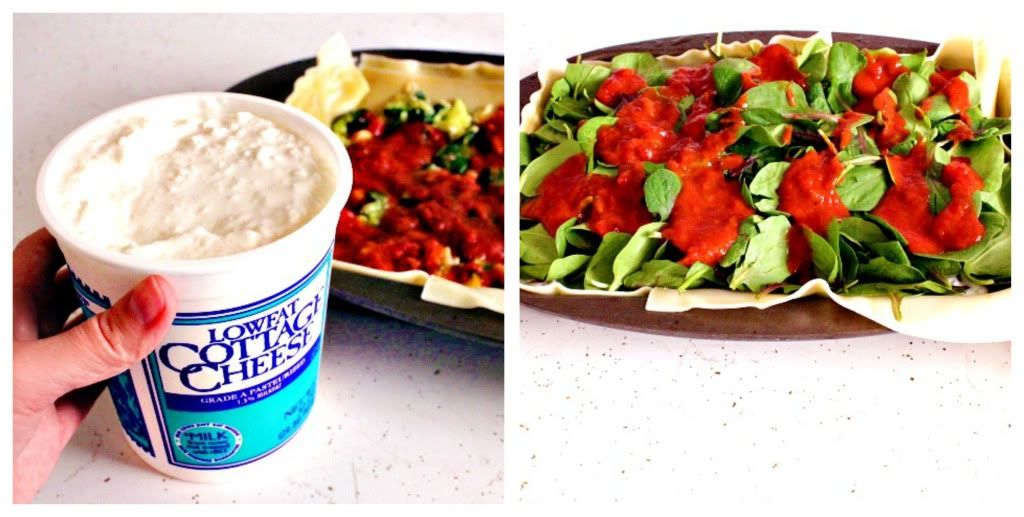
A layer of low-fat cottage cheese- my mom taught me this trick, it's a really kid-friendly (and inexpensive) alternative to ricotta. Mix a single egg in with it to act as a binder and help solidify the layers.


Next, we add a layer of fresh spinach (I really pile it high, because it shrinks to a very tiny layer once in the oven). Add just a bit more marinara now, then fold in the bottom layer of noodles over the edges. 
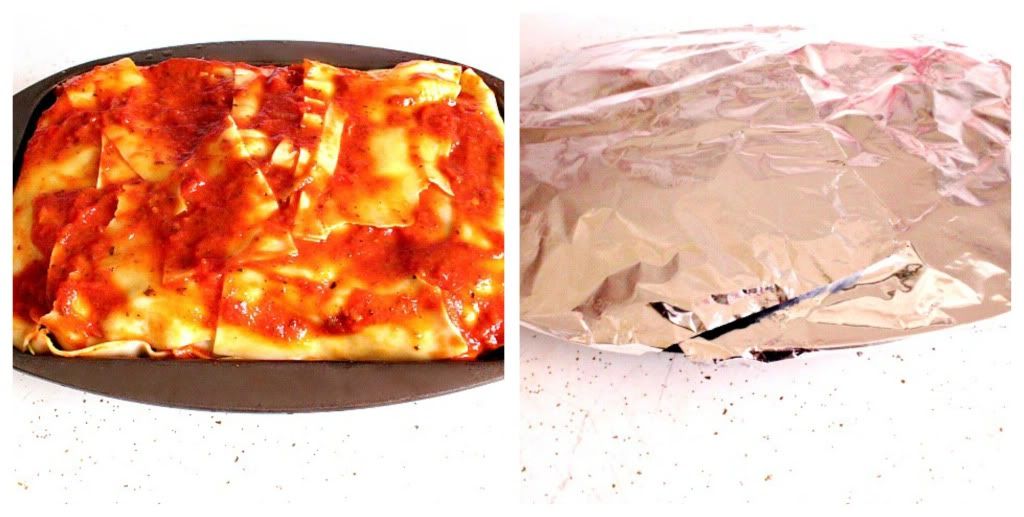
 Fill in the top with additional noodles, and cover it all with sauce.

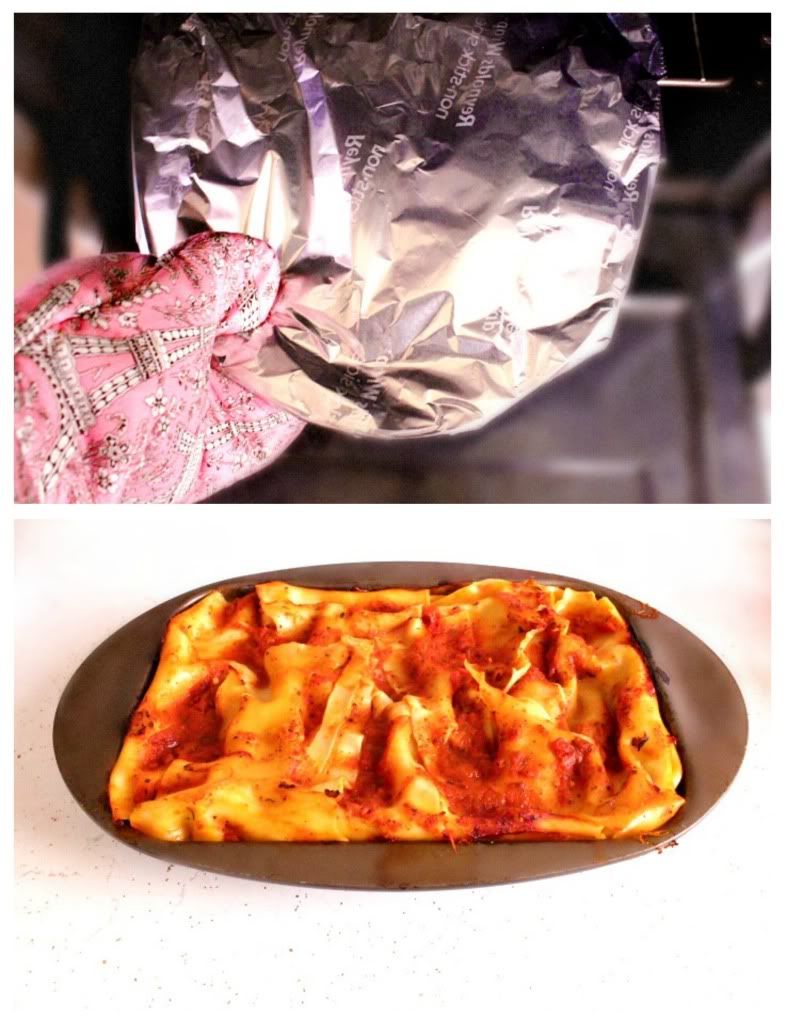
Now we cover it with foil, and pop it into a 350 oven for about 30 minutes. 
Are you wondering where the cheese in this "cheesy" lasagna is?

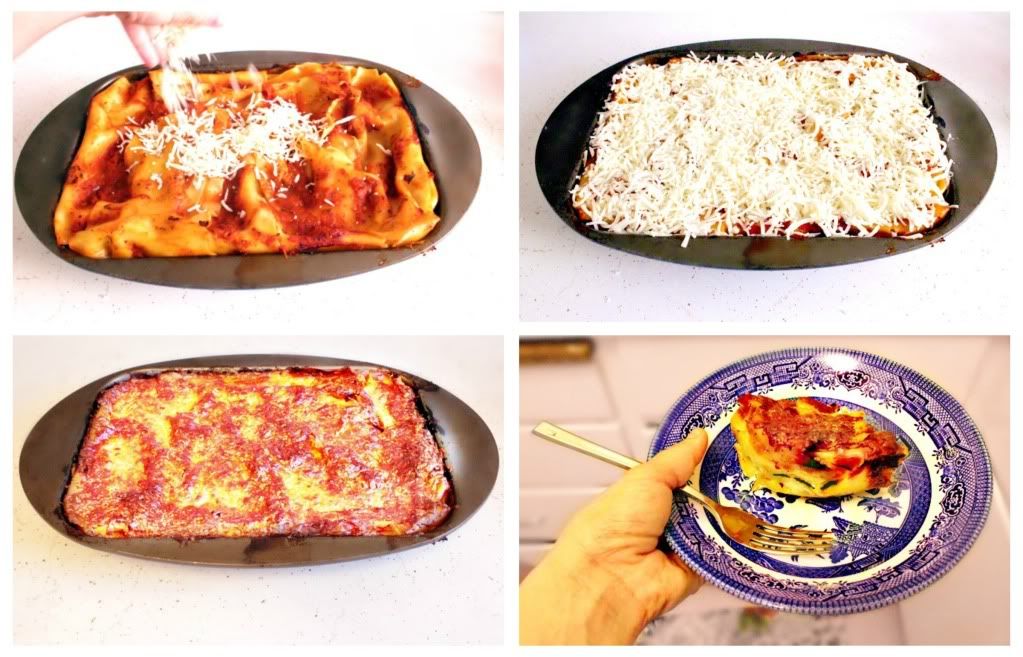
I take mine out of the oven when it's half-cooked, and cover the top with shredded mozzarella. 
Then put it back in without the tin foil and turn the oven down to 325 for 30 minutes. 
Cool and serve.

YUM!


Thursday, February 16, 2012

comfort food...

What's your idea of comfort food? In our house, it's fideo. It's like a bowl of cozy.
Elliott helped me make a big pot of it this week.

Photobucket

We start with fideo noodles. Basic semolina pasta, broken into little pieces.
I buy these bags for about .50 cents each, but you can break up your own pasta
in a big ziplock bag too. I used to toast them on the stovetop,
stirring constantly- labor intensive! Now I just
drizzle a bit of olive oil in a baking dish, pour in the fideo, and toss them
around so the oil coats all the noodles, and then pop them in a 350º
oven for around 10 minutes. They come out perfect. So easy!

Elliott and I are using 2 bags (7 oz. each) in this recipe.

Photobucket

Photobucket

Don't be afraid if your noodles look very dark. The fideo will be delicious!

Photobucket

Next, we chop and sauté one onion, with a few cloves of minced garlic- about 5 minutes.
Add 2 tsp. salt, and the toasted fideo noodles. Stir.
Add a large (28 oz.) can of diced tomatoes (undrained). Stir. Let simmer 5 minutes.
Fill the empty tomato can with water and add to mixture (twice).
While the pot comes to a boil, chop up 2 bunches of fresh cilantro. It smells SO good!

We like ours with lots of cumin. I use a whole 1 oz. package of it for one pot.

Add half of the cumin now.
Add a tablespoon of black pepper.
Add half of the chopped cilantro right away.
Let the pot boil until the fideo noodles are cooked through.

Photobucket
Photobucket

When the noodles are tender, I turn off the heat, add the remainder
of my cumin and chopped cilantro, and give it all a good stir.
Lastly, I add a large container of chicken broth (32 oz.).

Adjust salt and pepper to taste. Add extra broth, as needed- it will thicken.

This soup is SO forgiving. It's our favorite. :)

Tuesday, February 7, 2012

Some bunny's having their first sick day...


Elliott's not feeling very well, so he's hanging out in the warm, cozy kitchen with mommy,
"helping" me make fideo. Best helper ever. :)