Showing posts with label Food. Show all posts

Wednesday, December 19, 2012

Easy peasy sushi yummy...


In this- the Season of get-togethers, parties, and communal meals... I thought I'd share one of my favorite appetizer recipes.  This is a quick-ish, basic (non-raw) sushi, that's easy to make, and fun to share.  Jeff thought they looked fancy, but when I was a kid- this was the sushi you took to school for class parties, or had at pot-lucks, church events, and BBQ's.  It was always around, always a kid-favorite, and fun- but definitely not fancy.  Basically it's the potato salad of sushi.

You'll need: Bamboo rolling mat, short-grain sushi rice, package of nori, 2 cans of tuna, 1 carrot, 1 egg, sugar, salt, rice vinegar, (optional:) colored shrimp powder, sesame seeds.

1. Make a good batch of sushi rice (please don't replace this with another type of rice- it ruins the sushi).  
Need a good recipe for perfect sushi rice?  I like this one (scroll down on the page).

2. Shave your carrot with a vegetable peeler.  The longer the peels, the better.

3. Scramble your egg and pour it into a hot non-stick pan- the goal is a very thin, crepe-like end result.  It only takes about 20-30 seconds, so watch carefully.  Remove from heat, let cool, and slice in strips.

4. Drain and empty your tuna into a bowl, add about 2 TBS. sugar, and 2 TBS. rice vinegar. Mix well.  Set aside.

5. Place your nori rough side up on the bamboo mat, add rice evenly to the bottom 2/3 of the nori, place one strip of egg, one length of carrot, a generous line of tuna, and a teeny line of shrimp powder all the way down the center- horizontally.  

6. Roll carefully, quickly, and firmly (but not too hard).  It may take a few tries- but you'll get it.  Then simply

SLICE + SERVE!  

 If you have sesame seeds, add a tiny pinch to the top of each slice, right in the center.  I like to wrap extra rolls, unsliced, in wax paper and slice those as needed just before they're served.  This is a great party appetizer, or snack, but they're best eaten fresh and at room temperature.  ENJOY!  


*UPDATE: I forgot to mention this, but it's important... keep a bowl of water nearby to dip your fingers in before and after handling the rice.  It's soooo sticky- the rice will help keep things neat and tidy.  But make sure the water doesn't drip on your nori- things will go downhill fast.  Also, at the very end of the rolling process, use your finger to lightly pat a little water just on the very end.  It acts as a seal to keep your sushi roll tightly closed.  :)


Thursday, July 19, 2012

Farmer's Market fun...

Will you be at Farmer's Market tonight?  I love all the gorgeous Summer crops.  I love the crazy long lines and mega-crowds a lot less.  But the people-watching never disappoints.  


Tuesday, June 12, 2012

hot dog!

This may not be the fashionable thing to say, but...  I love a good hot dog.

I don't actually eat meat very often, but once every couple of months I have a ridiculous hot dog craving, and so... once every couple of months- we'll have a ridiculous hot dog dinner.  It's easy for a hot dog dinner to be sufficiently gross- so I've learned to follow a few basic rules before presenting this ballpark favorite to my family...

1. Most importantly, buy really great hot dogs.  
If you had to pick just one thing to be insanely picky about in life- it should be this.

2. Make them special.  
As in, fancy little baguettes instead of buns, a variety of mustards, pretty plates and fabric napkins, etc.

3. Serve them with something really fresh.  
I like a simple arugula salad with most every meal, but a nice tabouli, or quinoa salad would be great too.


And I ask you... What says "SUMMER" better than a tasty hot dog on the back porch at the end of the day?   :)


Monday, May 28, 2012

Who's your little cookie...


Have you tried the dark chocolate sea salt cookies at Linnaea's yet?

Oh my gosh...  chewy, chocolatey... 
just the riiiight amount of salty-sweet

PERFECTION.


Sunday, April 15, 2012

Let's make... SPROUTS!

How do you feel about sprouts?


I looooove sprouts.  LOVE them.  Is that weird?  They're teeny, yummy, and fun to eat!  As a kid, I'd snack on them by the handful.  I secretly still do.  And you know what... Jeff and Evy aren't big veggie or salad eaters, but they will inexplicably gobble up sprouts in sandwiches, and quesadillas.  Even Elliott's starting to eat them!  It makes me happy to have them around and know that my picky eaters will get a tasty, nutrient-packed punch.  Different varieties offer different benefits, but many are full of heart healthy compounds, anti-cancer isoflavones and sulforaphane, as well as protein, vitamins A, C, and D, calcium, and folate.  Current studies even suggest that sprouts may prevent and reduce menopausal symptoms.  All this goodness contained in those cute little greenies?  Amazing!

While pregnant with Elliott I craaaaved sprouts.  I harassed the guy at the Mt. Olive stand at Farmers Market every Thursday, and wiped out his sprout stock frequently.  That is, until I started growing my own!  It's so easy, WAY cheaper, and surprisingly fun too!

Here's my home-grown sprout DIY:


I like to start with a mix of Alfalfa, Mustard, Mung, radish and Broccoli seeds.  Radish, mustard and broccoli sprouts seem to offer a mild peppery flavor.  Not spicy, just more flavorful, really.  I can feed this mixture to the baby.  I buy my seeds in the bulk section at SLO Natural Foods Co-op.  Did you know that you need not be a member?  It's a great spot for picking up healthy basics downtown.  


Next, you'll need a jar.  Most health food stores carry sprouting jars.  If you don't see them, ask.  You can grow sprouts in any large, glass jar with cheesecloth and a rubber band.  My jar has a wonderful wire mesh lid and I paid around $6.  Excellent deal and very easy to use.  


Add a spoonful of seeds to your jar.  


Now, rinse them a bit, fill your jar 1/3 with fresh water, and leave your seeds overnight.


You'll notice the seeds beginning to expand and soften underwater.  

Homework:  The following morning, you'll want to completely drain the water from your jar and rinse the seeds several times.  I rinse them twice in the morning, once in the afternoon, and one more time before I go to bed.  The seeds should be kept in a shady (but not dark) spot in the kitchen, and kept moist, but never sit in water after the first night.  After 2-3 days of rinsing, your seeds will be quite sprouted and ready for a few hours of indirect sunlight to soak up healthy chlorophyll and turn a darker shade of green.  

And then... 


VOILA!  Your very own yummy, home-grown sprouts!  I keep mine in a covered Tupperware container in the fridge, with a paper towel to soak up any remaining water.  They'll last nearly a week, unless gobbled up. 


UPDATE:
My mother has asked that I stress the importance of the RINSING in growing sprouts.  To quote her: "If not properly rinsed and stored sprouts can become a bacterial garden in a jar."  Very true, mom.  Good advice.  This project is all about the RINSE, RINSE, RINSE.  And then rinse one more time.  ;)


Friday, March 23, 2012

NOVO love...


It's no secret that I'm a huge Novo fan. It's not just that I'm addicted to the spring rolls and the scallops... It's not just the incredible creekside setting... A few years ago the good folks at Novo even allowed me to invade their kitchen when I found myself tormented over the prospect of culinary school. They're the sweetest.

 Ok, the truth is, I love everything about Novo. I love that it's a fun, casual spot to catch up with girlfriends and share tapas. I love that I can roll in with a baby and stroller and know that no one's going to glare at me. And like that perfect versatile dress that transitions seamlessly from day to night, after dark Novo magically transforms itself into the most beautifully lit, romantic restaurant in town. I'm partial to the lavender cocktail and chocolate truffle desserts; best served on the terrace under big, twinkling trees.


Jeffrey
 likes to tease me for ordering their take-out all the time, because he thinks it's "fancy".  
Fine... it's a little fancy, but did you know that Novo offers its take-out orders at a 20% discount? 
 A happy customer is extra fancy!
I am a verrry happy Novo customer. Can you tell? :)


P.S.

HAVE A REALLY HAPPY WEEKEND, EVERYONE!  The weather is so beautiful.  Evy's performing with her baton troupe at the Madonna Inn tomorrow, and then...  Paso is calling our name.  What about you guys?  Do you have plans, or are you more the "wing it" type?


Friday, March 2, 2012

let's make veggie lasagna!

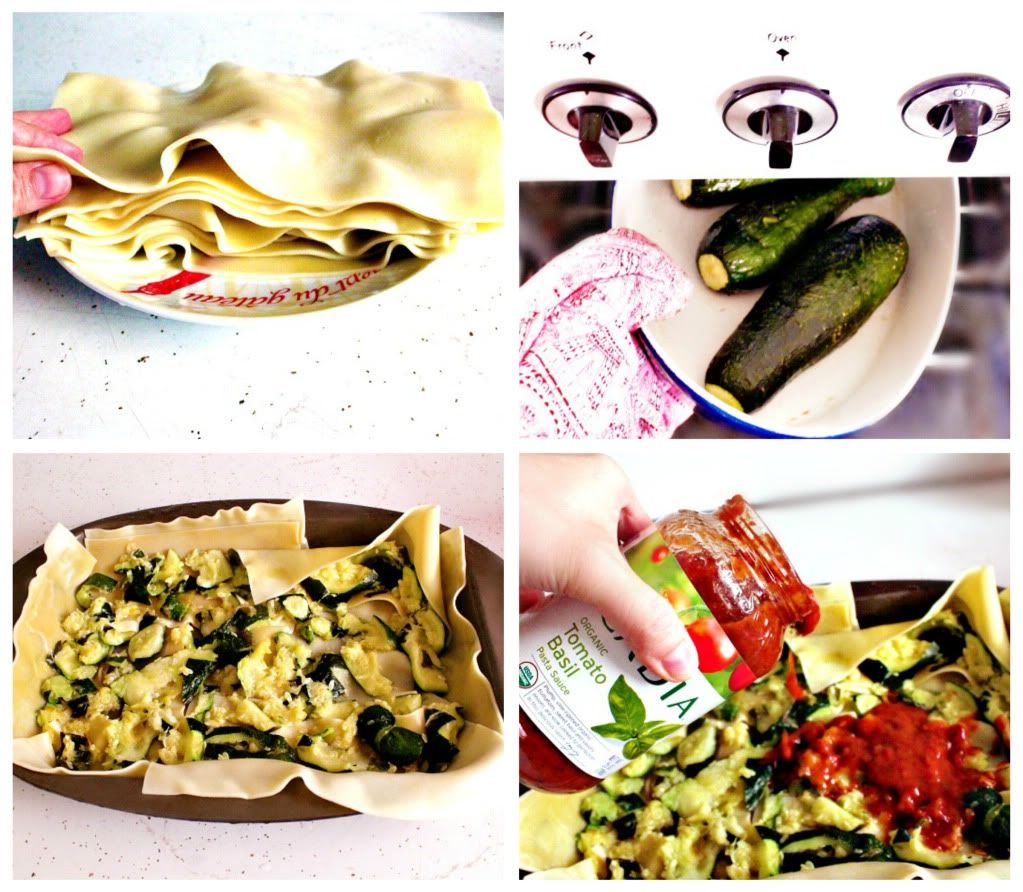
Every once in a while, I crave a super yummy, super cheese-y LASAGNA! Elliott and I made a quick and easy, veggie-packed lasagna this week. We started by boiling one package of pasta...


Lasagna is all about the layering. We do a very thin layer of marinara, a solid layer of noodles, 
and then roasted zucchini (mashed & drained)...


Now more marinara...
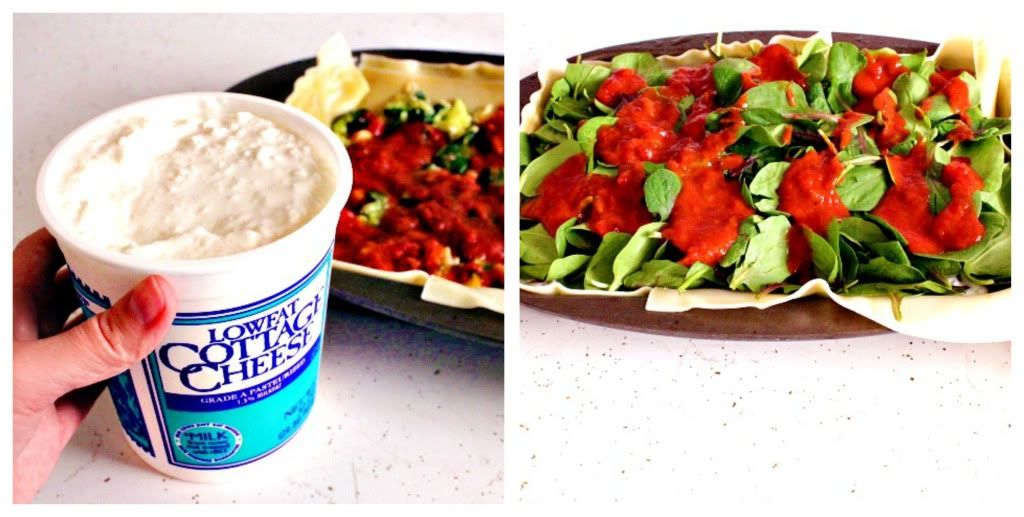
A layer of low-fat cottage cheese- my mom taught me this trick, it's a really kid-friendly (and inexpensive) alternative to ricotta. Mix a single egg in with it to act as a binder and help solidify the layers.


Next, we add a layer of fresh spinach (I really pile it high, because it shrinks to a very tiny layer once in the oven). Add just a bit more marinara now, then fold in the bottom layer of noodles over the edges. 
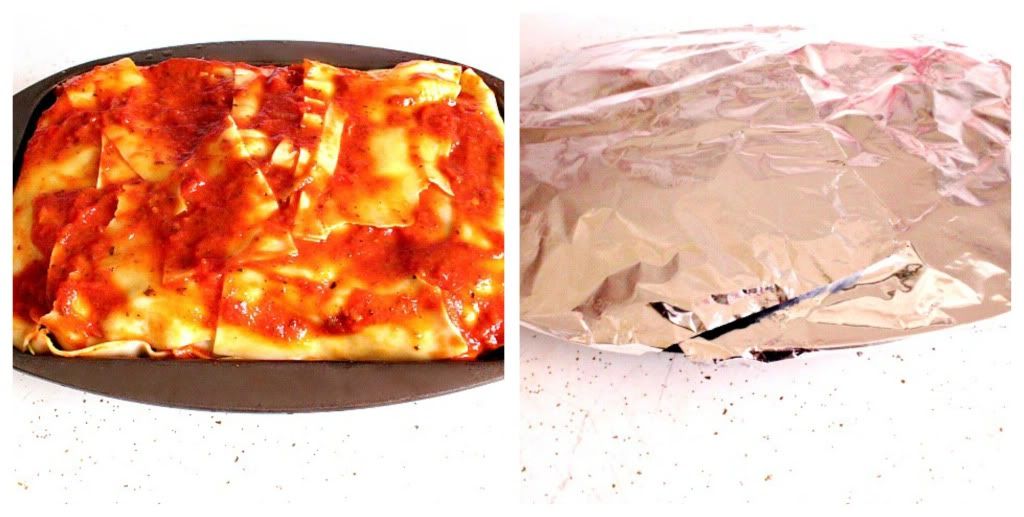
 Fill in the top with additional noodles, and cover it all with sauce.

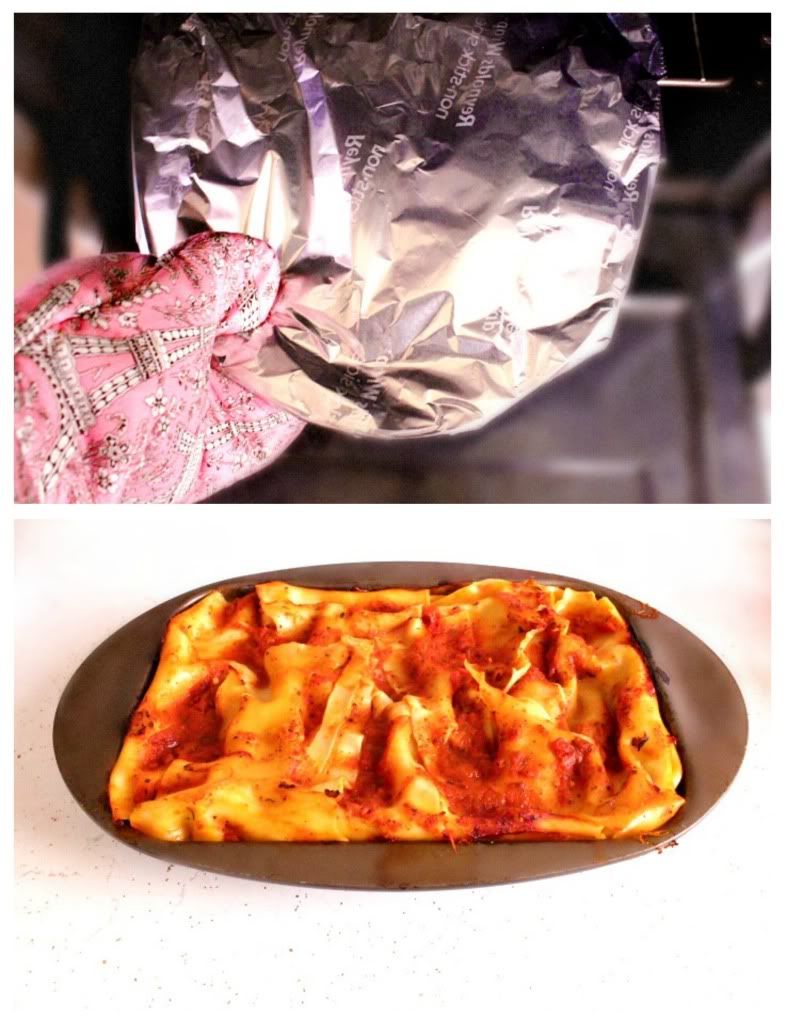
Now we cover it with foil, and pop it into a 350 oven for about 30 minutes. 
Are you wondering where the cheese in this "cheesy" lasagna is?

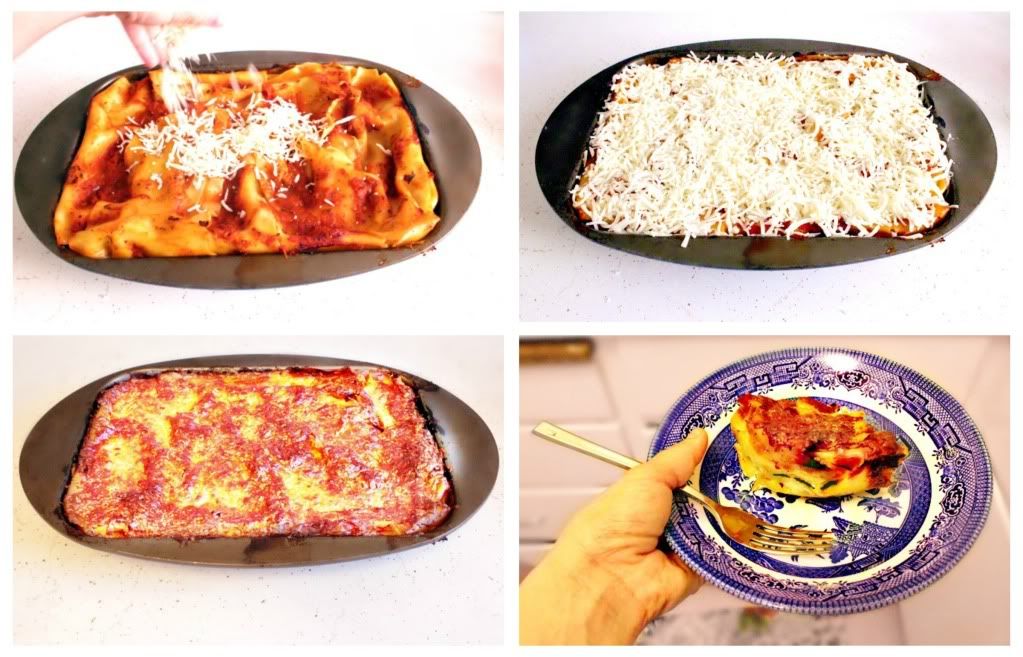
I take mine out of the oven when it's half-cooked, and cover the top with shredded mozzarella. 
Then put it back in without the tin foil and turn the oven down to 325 for 30 minutes. 
Cool and serve.

YUM!


Thursday, March 1, 2012

localette...


I've just discovered Jennifer Olson's stunning food blog, "Localette". It's got me both inspired and totally paralyzed! Her photos are so stunning, and her dishes, so beautiful- I think:


My gosh, what's the point of posting food and recipes when she's doing it well enough for everyone?! 
I mean just LOOK at these! Could she be any more talented and lovely?


But I tighten my apron strings and soldier on- 
 chipped nail polish in my photos, and all...

Jennifer, you are my hero.

Love,


Tuesday, October 18, 2011

Mmm... mush. Yum!

Today I made Elliott a teensy bowl of rice cereal- not so much with the
expectation of him eating it... but rather as a little practice for when he does.
You might even call it a dress rehearsal, complete with costume! Kinda.

Mmmm... mush. YUM!

1. I quickly learned that he prefers to be in charge of his own spoon...

2. I also learned that letting this kid loose with a spoon
necessitates a good bib.

3. The finale... in which Elliott eats his bib, and... *drumroll please*

LAUGHS!